3D digitisation of heritage objects: how to get started?
- Tech Blog

Even though museums and heritage organisations are currently working hard to digitise their analogue collections, creating digital 3D models of collection items still remains a relatively unexplored area. Fortunately, the GIVE Flemish masterpieces project has given us an opportunity to digitise a large number of sculptures, which are recognised as masterpieces, in 3D. In this tech blog, we look in more detail at a potential working method and practical step-by-step plan – based on our specific experience from this initial project – in which practical feasibility, sustainable archiving and the widest possible (re)usability of the digital copies are paramount.
The GIVE project is part of the Flemish Government’s Resilience Recovery Plan and has been made possible with support from the European Regional Development Fund (ERDF).
1. How do I prepare?
Consider the digitisation end goal
What is the aim of the digitisation? What do you want to do with the digital 3D models?
We set the bar high for this project and started with the aim of achieving as much usability as possible for the digital 3D model, rather than having a specific practical application in mind. This means that requirements for the end result can be adapted to each specific objective, e.g. creating an analogue copy of the object based on the digital model at a later date is different from presenting objects online with an updated 3D viewer.
Choose which technique to use
We purposely chose to use the scanning method for our objects in the GIVE project. Because we are working in situ and only creating 3D models using photogrammetry afterwards, it’s essential that all our required captures are done on site so we can produce a complete 3D representation later on. If it then turns out that we have missed anything, we will have to return to this original location to fill in the gaps. In the case of complex colours and textures, the scan can be supplemented with a limited number of photographs taken on site.
Depending on the end result and purpose you have in mind, you might also be able to use photographic captures from various devices for the photogrammetry: from operating a simple device (such as a smartphone) yourself to hiring a specialist professional photographer.
Select the objects you want to digitise
Our tips:
Group objects together based on their dimensions.
It is important to take the object’s dimensions into account when choosing which ones to digitise. Especially with scanning, it is important to group together objects of more or less the same size, because different scanning devices are used for smaller objects than for larger ones.
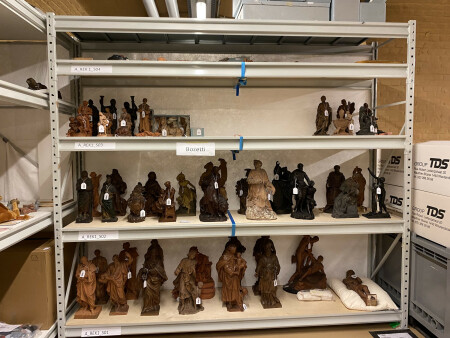
Pictured: the Van Herck collection grouped by size, KMSKA (Royal Museum of Fine Arts Antwerp) collection, photo by meemoo, licence: CC BY-SA 4.0
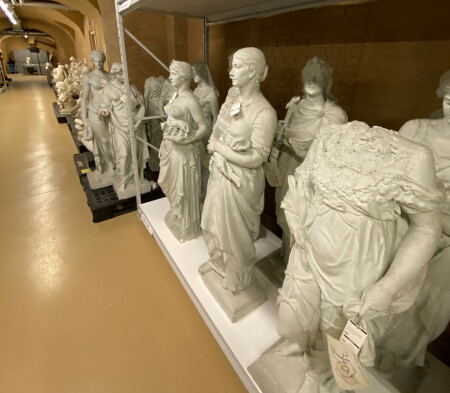
Pictured: KMSKA (Royal Museum of Fine Arts Antwerp) collection grouped by size, KMSKA collection, photo by meemoo, licence: CC BY-SA 4.0
Take into account any limitations in terms of translucent and/or reflective materials when scanning.
Keep in mind that not all objects can be scanned equally well. For example, it is more difficult to capture translucent or reflective objects when scanning with structural light where a pattern is projected onto the object. The video below demonstrates the projection of the pattern on a sculpture from the KMSKA (Royal Museum of Fine Arts Antwerp) collection.
Don't see a video? Please check your cookie settings so we can show this content to you too.
Edit your cookie preferences hereCan’t see the video? Please check your cookie settings and allow us to show you this content. You can change your cookie settings at the bottom of this page. Click on ‘change your consent’ above the table and select ‘preferences’ and ‘statistics’.
Find a suitable digitisation partner
Do this based on the technique you have chosen.
Draw up a list of suitable service providers who can carry out the work. Pay attention to any experience they have with heritage objects;
Prepare a detailed specification of what you want to achieve and ask for several quotes. You can find the specification for the GIVE project here;
Evaluate the quotes based on the specification requirements and award the contract to the highest scoring offer.
2. How do I approach doing the digitisation myself?
Since we have specific experience with 3D scanning, we only look in more detail at 3D digitisation using scanning in this step.
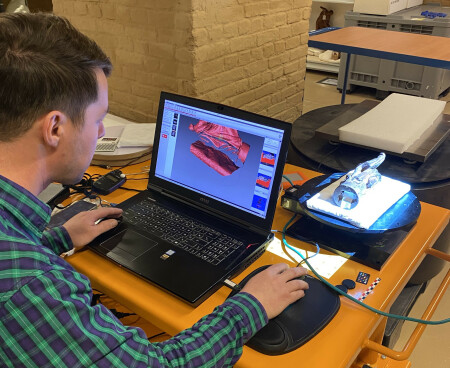
Scanning a sculpture takes 60-90 minutes on average, including processing time and on-site checking. For smaller objects and when working in batches, we can scan eight to twelve objects per day. The scanning procedure is as follows:
Scanning preferably takes place in a room where there are no visitors, either in a repository or when the museum is closed;
If necessary and possible, the object is positioned so that it is freestanding with enough space around it for scanning;
We place a calibration scale and colour chart next to the object
We cannot use this method for effective quality control at this stage yet (there are currently no standards available for 3D digitisation). But if this becomes possible at a later date, we will then be able to experiment with these files.
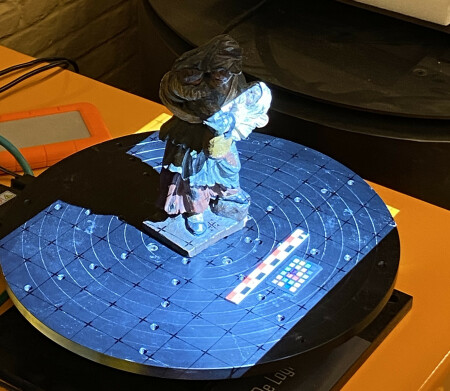
Pictured: calibration scale and colour chart next to the scanned object, sculpture from the KMSKA (Royal Museum of Fine Arts Antwerp) collection, photo by meemoo, licence: CC BY-SA 4.0
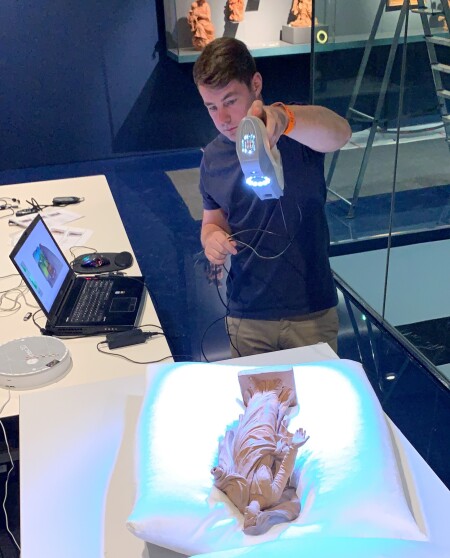
Pictured: using a hand-held scanner, sculpture from the KMSKA collection, photo by meemoo, licence: CC BY-SA 4.0
When using a hand-held scanner for larger objects, the object is scanned from all angles in different sessions, and rotated or placed on a cushion in between.
Smaller objects can be captured with a fixed scanning device and placed on a turntable that is synchronised with the scanning device software.
Don't see a video? Please check your cookie settings so we can show this content to you too.
Edit your cookie preferences hereCan’t see the video? Please check your cookie settings and allow us to show you this content. You can change your cookie settings at the bottom of this page. Click on ‘change your consent’ above the table and select ‘preferences’ and ‘statistics’.
The software combines the different scan sessions into one 3D model. You can see the result in the video above.
Ideally, the processing is done on-site to check for any gaps in the mesh – the collection of points and triangles that form the object’s geometry. Additional parts are then scanned if necessary.
For more complex colours and textures, additional photos can be taken so that the 3D software can process them afterwards to obtain an even more lifelike representation.
Finally, the generated files are subjected to a quality control check using free Blender software. We have drawn up a manual in collaboration with an external consultant as part of the GIVE project specifically for this. After importing the 3D models into Blender, we check several standard aspects such as consistent geometry and any overlapping surfaces.
3. How do you save the 3D digitisation results?
Meemoo chose OBJ or wavefront format for delivery of the files due to its accessibility and openness. We also requested STL files, which are suitable for 3D printing. With sustainable archiving and maximum possibilities for re-use in mind, the following file formats are being supplied to meemoo:
OBJ high-resolution copy for archiving;
OBJ copy for wide distribution;
OBJ copy with calibration scale and colour chart for possible quality control;
STL file for 3D printing.
The OBJ copies are supplied in packages of files consisting of the OBJ file itself, the colour and texture file in TIFF or BMP format, and an MTL file that links the TIFF or BMP file to the OBJ.
Meemoo will soon start specific research into the sustainable preservation of 3D models. The results of this research will be published in the course of 2024.
4. How do you make the 3D digitisation results accessible?
The most obvious platform for making 3D models available for re-use is Sketchfab. This tool allows you to make the models available for download, or integrate a viewer in your own collection website using a Sketchfab plug-in.
There are also some applications available that can be used for your own collection presentation:
The ERFGOEDAPP from Faro offers various practical options to collection visitors;
You can use 3D printing to make analogue copies or replicas of objects;
There are various VR or AR applications available in which you can integrate 3D models.

